Tuesday, February 27, 2007

BSOD with Longhorn Installation

I downloaded the "Windows Server Longhorn (x64) Checked/Debug Build February 2007 CTP - DVD (English)" ISO image from MSDN. I went to bed when the download was less than halfway completed, and Vista Ultimate x64 estimated another 3 hours and 39 minutes to complete the download.

The download was completed by the time I checked it the following morning. I burned the ISO image to a DVD and went to work.

After dinner, I attempted to finally install Longhorn on the new disk drive I had added to Nighthawk the previous day.

The installation displayed the "Windows is loading files..." message with the progress bar.

Immediately after the loading of files completed, the Blue Screen of Death (BSOD) was displayed with the following codes:

STOP: 0x0000007E (0xFFFFFFFFC0000420, 0xFFFFF8000A5CF037, 0xFFFFFA6001BB9DD8, 0xFFFFFA6001BB97A0)

I restarted and tried the installation again with the same result.

What about installing Longhorn in a virtual PC using Virtual PC 2007?

Good idea!

The installation in a virtual PC displayed the "Windows is loading files..." message with the progress bar.

It was a promising start, but unfortunately Virtual PC 2007 is unable to support x64 operating systems.

The error message displayed by the Longhorn installation was: "Attempting to load a 64-bit application, however this CPU is not compatible with 64-bit mode."

Although Nighthawk is running an x64 Intel Core 2 Duo E6700 CPU, Virtual PC 2007 emulates an x86 processor. I checked the BIOS for the virtual PC to check whether this could be changed. Unfortunately, the emulated processor type cannot be changed in Virtual PC 2007.

I needed the x86 version of Longhorn to install in a virtual PC, so I started downloading the "Windows Server Longhorn (x86) February 2007 CTP - DVD (English)" ISO image from MSDN.

However, my goal is to install Longhorn in its own disk drive in Nighthawk alongside Windows XP MCE 2005 and Vista Ultimate x64 in a multi-boot environment.

I suspect that the Longhorn installation BSOD was a result of Longhorn unable to cope with the other 2 operating systems already installed in Nighthawk.

My next step is to solve this problem before I install Longhorn x86 in a virtual PC using Virtual PC 2007.

Monday, February 26, 2007

Installing a new disk drive

The installation of a new additional disk drive in an Antec Nine Hundred case is relatively easy and quick. The steps are:
  1. Remove both side panels of the case;
  2. Remove the 8 thumb screws on both sides (4 on each side) of the drive cage;
  3. Disconnect the SATA and power cables from the disk drives and case fan;
  4. Slide the drive cage forward completely out of the case;
  5. Install the new disk drive in the drive cage with 4 screws (2 on each side);
  6. Reverse the process.
I restarted Nighthawk after installing the new disk drive and went into BIOS to verify that the disk drive was recognized, saved the BIOS settings, and re-booted into Windows XP MCE 2005.

I disabled the new drive using Device Manager in Windows XP MCE 2005. I don't want Windows XP MCE 2005 accessing and using this new drive reserved for Longhorn, just as the RAID0 Volume containing Vista Ultimate x64 is disabled in Windows XP MCE 2005.

To summarize, Nighthawk now has 2 RAID0 Volumes on 2 physical drives (500GB Maxtor SATA) and the non-RAID 500GB Western Digital SATA.) All 3 disk drives are connected to the Intel ICH8R Controller (SATA ports 1-3.)

I then restarted Nighthawk and booted Vista Ultimate x64.

I ran the Intel Matrix Storage Console to verify that the Intel ICH8R Controller recognized the new disk drive. It did recognize the new Western Digital 500GB disk drive as a non-RAID drive.

(I've just noticed while writing this post that my SATA DVD-RW optical drive is missing. I must have forgotten to reconnect its SATA cable!)

Device Manager in Vista Ultimate x64 also shows the new Western Digital disk drive.

Note that Everest Ultimate shows the new Western Digital 500GB disk drive running at a cool 25C/77F due in part to the cooling prowess of the Antec Nine Hundred case. This case has 2 removable disk drive cages which can accommodate 3 disk drives each. Each drive bay has its own 120mm Fan in front to cool the disk drives.

The next step is to install Longhorn in the new disk drive.

Sunday, February 25, 2007

Preparing for Longhorn

"Longhorn" is the code name for Microsoft's next generation Windows Server which was developed alongside Vista in the same project. Both operating systems "share a number of new technologies across networking, storage, security and management."

I will be installing the Longhorn Beta on Nighthawk which already has the Windows XP MCE 2005 and Vista Ultimate x64 operating systems installed in a "dual boot" setup. In addition, the Windows 98SE, Windows XP Professional and Ubuntu operating systems are installed in virtual PCs using Virtual PC 2007 running under Vista Ultimate x64 on Nighthawk.

The Longhorn Beta will be installed in its own 500 GB disk drive which I will be adding to the 2 existing 500 GB disk drives hosting 2 RAID0 Volumes, one each for Windows XP MCE 2005 and Vista Ultimate x64.

My immediate goal is to be able to boot either Windows XP MCE 2005, Vista Ultimate x64, or Longhorn on Nighthawk. I can already boot either Windows XP MCE 2005 or Vista Ultimate x64 today on Nighthawk.

How to accomplish this?

Good question. I don't know at this point. Vista has changed the multi-boot landscape and I will have to research this problem.

My first step was to install VistaBootPRO 3.1 Beta from PROnetworks to get a picture of the "boot" situation on Nighthawk.

During the installation of VistaBootPRO, the DreamScene background on my second monitor turned to black, and the "Display driver stopped responding and has recovered" error message at the end.

VistaBootPRO itself informed me that it did not detect Vista or that Nighthawk may have an "irregular drive configuration." Starting VistaBootPRO displays the same warning message, but it does start and run.

VistaBootPRO correctly detects both Windows XP MCE 2005 (as "Earlier Version of Windows") and Vista Ultimate x64, on Boot drives D and C, respectively.

Background: Windows XP MCE 2005 was the first operating system installed in the C drive on Nighthawk. The second volume was disabled in Windows XP MCE 2005, and Vista Ultimate x64 was subsequently installed in this RAID0 volume. Vista made its own partition the C drive and changed the Windows XP MCE 2005 partition as the D drive.

The first action I took after starting VistaBootPRO was to backup the Boot Configuration Data (BCD) as recommended.

The interface for the BCD backup is confusing. There is an input field for the "Save Location" which I specified. Clicking on the "Save" button then presented the normal Windows Explorer interface which totally ignored the save location I had specified previously, but the backup was successful.

I selected to display a "detailed" view of the Boot Configuration Data (BCD) store.

Very interesting.

If I am reading and interpreting this information correctly, Windows Boot Manager (the initial system booted from a disk drive which allows the boot selection for Windows XP MCE 2005 or Vista Ultimate x64) is on the same volume as Windows XP MCE 2005. This implies that this volume better be the first disk volume specified in the BIOS Boot Priority (and it is.)

Although I am not yet ready to make any changes to the Boot Configuration Data (BCD), I selected the "Manage OS Entries" option in VistaBootPRO to check what options are available.

VistaBootPRO appears to be an easy tool for managing the Boot Configuration Data (BCD). I'll let you know my verdict after I actually use it for updating the BCD.

My next step is to install the 3rd 500 GB disk drive in Nighthawk as a non-RAID drive with the existing 2 RAID0 volumes hosted on a RAID array of two 500 GB disk drives.

Thursday, February 22, 2007

The best of both worlds

Last night, I installed Windows XP Professional in a virtual PC on Nighthawk using Virtual PC 2007 running under Vista Ultimate x64 (RTM Build 6000.) The installation completed without a problem.

Even though the Windows XP Professional installation ISO image included SP2, there were still 72 "high priority" and 11 "optional" updates to be downloaded and installed! The optional updates required another 5 high priority updates.

I updated Internet Explorer to Version 7 and that required another 2 high priority updates.

I am pleasantly surprised by the performance of the virtual PC running Windows XP Professional. The virtual PC has 1 GB of real physical memory allocated to it, which probably contributes to the good performance. I am sure that Vanderpool Technology (Intel's virtualization technology) also has a lot to do with this good performance.

With this successful test of Virtual PC 2007 and the installation of Windows 98SE, Ubuntu 6.06 LTS, and Windows XP Professional on virtual PCs all running under Vista Ultimate x64 (RTM Build 6000), I am now in the process of installing Windows XP Professional in a virtual PC using Virtual PC 2007 on Blackbird, which is also running Vista Ultimate x64.

This will allow me to retire my Pentium III PC running Windows XP Home Edition. The reason why I have been keeping it around is to run software which does not run very well, if at all, on Vista Ultimate x64. This setup will allow me to run all programs which I use under Windows XP Professional or Vista Ultimate x64 on the same PC without requiring re-booting.

This Pentium III PC which has 2 GB of memory and 880 GB of disk space will be relocated to my "server" closet and re-purposed as another server running Windows Home Server, assuming I am selected to participate in the Beta program.

Wednesday, February 21, 2007

Ubuntu under Virtual PC 2007

After successfully installing Windows 98SE in a virtual PC using Microsoft's Virtual PC 2007, it was time to test using a non-Microsoft operating system.

I created a new virtual PC and downloaded Ubuntu 6.10 - "the Newest Ubuntu Release." It would not install using Virtual PC 2007 because of incompatibility related to color depth. Ubuntu 6.10 defaults to 24-bit color depth and Virtual PC 2007 supports a maximum of 16-bit color.

There are documented workarounds for this problem, but I could not get any of them to work. I'll look into this problem again in the future.

Meanwhile, I downloaded Ubuntu 6.06 LTS - "Ubuntu with Long Term Support."

This version installed using Virtual PC 2007 without a problem by selecting the "safe graphics mode" option.

After the successful installation of Ubuntu 6.06 LTS, it detected updates which I installed promptly. The only problem I had to address was to enable the sound by specifying the Sound Blaster 16 sound card which Virtual PC 2007 emulates.

Many people have reported "crackling" sound problems with the SoundMAX device installed on the ASUS P5B Deluxe WiFi-AP motherboard. I have not experienced this problem in either Windows XP MCE 2005 or Vista Ultimate x64 (RTM Build 6000) which are both installed in Nighthawk.

It is interesting that I am now encountering this problem with sound generated from the virtual PC running Ubuntu. However, there is no problem with the sound generated from the host Vista Ultimate x64 (RTM Build 6000.)

Very strange.

The captured image on the right shows 2 virtual PCs running Ubuntu (in the foreground) and Windows 98SE (in the background), both of which are hosted by Virtual PC 2007 running in Vista Ultimate x64 (RTM Build 6000.)

Next up: Installing Windows XP Professional using Virtual PC 2007.

Tuesday, February 20, 2007

Installing Windows 98SE on Nighthawk

Yep. You read that right. I installed Windows 98SE on Nighthawk last night.

Why?

Actually, I first installed Microsoft's Virtual PC 2007 which was released to the general public just recently. It is installed in Vista Ultimate x64 (RTM Build 6000) on Nighthawk.

I needed an operating system to install and test Virtual PC 2007. I had a copy of Windows 98SE handy, so I decided to install it under Virtual PC 2007 as my initial test.

After creating and starting a Virtual PC, I inserted the Windows 98SE CDROM and installation diskette to start installation. Windows 98SE installed without any problem under Virtual PC 2007.

It has been a long time since I installed and used Windows 98SE. I initially could not figure out why starting the Internet Explorer browser kept prompting me to identify a modem to use for the Internet connection. I can't even remember the last time I used a modem. I started using ISDN as soon as it became available to me and then switched to DSL when it also became available.

Once I finally remembered how to set up networking in Windows 98SE, I was able to browse the Web and access my other computers in my workgroup.

Windows 98SE works well under Virtual PC 2007. It is very easy to set up and use.

Have you noticed the "Vanderpool Technology" setting in BIOS for the ASUS P5B Deluxe WiFi-AP motherboard? It is Intel's virtualization technology and Virtual PC 2007 makes use of it. Enable it if you are using Virtual PC 2007.

The next operating system I will be installing using Virtual PC 2007 is Ubuntu. I also have 3 other Unix operating systems I want to try: Freespire, openSUSE and SUSE Linux Enterprise 10.

Of course, I will also be installing other flavors of the Windows operating system for both desktops and servers using Virtual PC 2007, including "Longhorn."

By the way, Virtual PC 2007 is free.

Monday, February 19, 2007

Your mileage may vary

When I initially started this Blog, I warned about using a "cookbook" approach to overclocking. The reason for this warning is that it is a given that the same exact component will perform differently. Assembling the same exact set of components make it even more of a certainty that the same assembled components will perform differently.

My own experiences, more recently with Blackbird and Nighthawk, have proven this truism. Even though I have successfully overclocked both Blackbird and Nighthawk to a stable 3.4 GHz, they have both reached this speed differently.

The Intel Core 2 Duo E6700 in Blackbird runs cooler at idle (32C/90F) and load (47C/117F) than Nighthawk which idles at 39C/102F and reaches 51C/124F at load with the same processor and Zalman CNPS9700 LED Heat Sink & Fan.

Interestingly, the ASUS P5B Deluxe WiFi-AP motherboard in Blackbird runs warmer at idle (34C/93F) and load (37C/99F) than Nighthawk which idles at 28C/82F and reaches 32C/90F at load with the same motherboard and Antec Nine Hundred case (with four 120mm fans and one 200mm fan.)

The above results were obtained using the System Stability Test in Everest Ultimate 2007 (Build 885) running under Vista Ultimate x64 RTM Build 6000.

The CPU VCore Voltage in Blakcbird is also set to 1.40V in BIOS, whereas Nighthawk requires 1.45V to run stable at the same overclocked speed of 3.4 GHz.

Furthermore, even though Blackbird and Nighthawk have the same exact amount and type of memory (4GB of Corsair XMS2 TWIN2X2048-8500C5 each), the same memory requires 2.15V in Blackbird and 2.25V in Nighthawk to run stable at 1:1 (DRAM:FSB) ratio at the same overclocked speed of 3.4 GHz!

The lesson here is obvious.

Even if you had the same exact components as either my Blackbird or Nighthawk computers, there is no guarantee that you will be able to attain the same stable overclocked speed. You may be able to attain more or less. It will also be almost certain that your system will require different settings even if it managed to attained the same overclocked speed.

Your mileage may not only vary, your mileage will vary.

Sunday, February 18, 2007

Also cool under stress

Blackbird has been running continuously without any problem for over 33 hours now with its new Zalman CNPS9700 LED HSF, and idle temperature for the CPU @ 3.4 GHz has remained steady at 31C/87.5F. The temperature of the motherboard has also stayed constant at 34C/93F.

How about under load?

The System Stability Test of Build Version 0841 of Everest Ultimate 2006 does not work in Vista Ultimate x64 so I downloaded Build 883 of Everest Ultimate 2007. The System Stability Test in this version works in Vista Ultimate x64.

After running the System Stability Test for 10 minutes, the CPU temperature under load remained steady at 47C/117F and the motherboard temperature at 37C/99F.

I do not know whether a fair comparison can be made with Nighthawk's performance since the System Stability Test in Everest Ultimate 2007 appears to behave differently compared with Everest Ultimate 2006. In Everest Ultimate 2007, the CPU utilization remains close to 100% the entire duration of the test.

Nighthawk's CPU peak temperature during the System Stability Test was 53C/127F for comparison, in case it is valid.

At the end of the System Stability Test, the CPU temperature dropped rapidly like a stone. This is a testament to the cooling effectiveness of the Zalman CNPS9700 LED HSF.

In less than a minute, the CPU temperature is back to its idle temperature of 31C/87.5 although it is really not at idle. I wonder if the CPU is ever idle while running Vista.

The Zalman CNPS9700 LED HSF is definitely a good investment.

Saturday, February 17, 2007

Running cooler

Last night before I went to bed, I loaded the BIOS default settings on Blackbird before shutting it down and powering off the PSU.

This morning, I started disassembling Blackbird around 8AM. The photo on the right shows the Intel stock HSF mounted on the Core 2 Duo E6700 before I removed it.

The processor was then removed from the ASUS P5B Deluxe WiFi-AP motherboard.

The bottom of the stock HSF is circular which can be discerned from the circular pattern of the leftover stock thermal paste left on top of the processor.

I wiped off the leftover thermal paste from the processor, then used cotton swabs dipped in rubbing alcohol to clean off the remnants.

The next step was to remove the motherboard from the case to install the mount and its back plate for the Zalman CNPS9700 LED HSF.

The photo on the right shows the Zalman cooler mount installed on the motherboard.

Except for the fact that the Zalman cooler mount has to be installed before the motherboard is installed inside the case, I prefer the way the Zalman HSF is installed compared to the stock Intel HSF.

If you are thinking about using the Zalman CNPS9700 LED HSF, I recommend installing it when you initially build your computer instead of waiting later to upgrade. This will save you a lot of work.

The photo on the left is another view of the Zalman cooler mount with the processor installed.

The final step before the actual installation of the Zalman HSF is the application of the supplied "Super Thermal Grease" (ZM-STG1) on top of the processor.

A brush applicator attached to the cap of the "Super Thermal Grease" bottle makes it easy to apply a uniform layer of thermal grease on the processor.

Finally, the Zalman CNPS9700 LED HSF is installed in the mount with a clip (S-Type) fastened with 2 screws. You have clear access to the screws, even the one on the fan side. The HSF will slide as you are installing it. Make sure you have it aligned straight and centered on the processor before tightening the screws.

I installed the BFG 7950GT graphics card and booted into BIOS before installing and connecting the other devices. It took several power on/off before Blackbird successfully POSTed. However, I did not have to clear RTC (Real Time Clock) in CMOS RAM as I had to with Nighthawk.

Approximately four hours later around noon, Blackbird was back together running cooler at its stable overclocked speed of 3.4 GHz.

How much cooler? The temperature for the CPU at idle is now 31C/87.5F or 8C cooler than with the stock HSF. I am very pleased about this result.

I also rearranged the devices installed at the front of the case to leave room for a longer graphics card in the future, and this resulted in a 1C drop in the motherboard temperature to 34C/93F.

I am still perplexed why the motherboard temperature is this high compared to Nighthawk. The overclocked processor is running cooler than the motherboard by 3C on Blackbird!

Friday, February 16, 2007

Blackbird also gets a new HSF

Just as Nighthawk got a new Zalman CNPS9700 LED HSF (Heat sink & Fan) last weekend, Blackbird will be getting the same HSF to replace the stock Intel HSF this weekend.

The photo on the right shows the size difference between the stock HSF and the Zalman HSF.

The Intel Core 2 Duo E6700 CPU in Blackbird has run cooler with the stock HSF than the same CPU (also with the stock HSF) in Nighthawk. In fact, Blackbird has been successfully overclocked to a stable 3.4 GHz with the stock HSF, whereas the maximum stable overclock Nighthawk was able to achieve with the stock HSF was 3.2 GHz.

At idle, Blackbird overclocked to 3.4 GHz with the stock HSF runs at 39C/102F for the CPU, but interestingly enough, the motherboard runs warmer at 35C/95F than Nighthawk. However, note that Blackbird has six 750 GB disk drives packed in its case whereas Nighthawk has only two 500 GB disk drives.

Here's another photo of the stock HSF and Zalman HSF in front of Nighthawk (on the left) and Blackbird (on the right.)

This time around, I will document the removal of the stock HSF and the installation of the Zalman HSF in Blackbird with photos.

I wonder whether I will have the same experience with this operation on Blackbird as I encountered with Nighthawk. This operation will begin after breakfast tomorrow morning.

Here's a "ground level" view of the two HSF's. Notice the smooth, mirror finish of the Zalman CNPS9700 LED HSF.

It will be interesting to see how much cooler the Core 2 Duo E6700 will run with the Zalman HSF in Blackbird.

Wednesday, February 14, 2007

A real scare

Yesterday, Microsoft's much anticipated DreamScene Windows Ultimate Extra was released as a "Preview Beta." Of course, I downloaded it immediately and installed it on Nighthawk. The preview comes with a single "Dream" or video to use as your desktop background. In this video, the rays move from side to side.

No, that wasn't the scare.

Yesterday, NVIDIA also released an updated Beta G80 (8800GTX and 8800GTS graphics cards) driver for Windows Vista x86 and x64. I downloaded Version 100.64 (dated 02/13/2007) last night, but decided to wait before installing it.

Tonight, I made the almost fatal decision to install it on Nighthawk. After uninstalling ForceWare Version 100.59, I installed Version 100.64. The installation completed without a problem.

I experienced problems with the NVIDIA Control panel, so I decided to uninstall and re-install nTune Version 5.05.25.00. The problems I previously documented have not been fixed with ForceWare Version 100.64. In fact, none of the major problems with Version 100.59 have been fixed. I believe that the only reason why NVIDIA release yet another Beta driver is to provide support for their new 8800GTS graphics card with half the memory (320 MB) of the original 8800GTS.

I left Nighthawk on idle while I worked on Blackbird. A few minutes later, I noticed disk activity and high CPU usage on Nighthawk so I switched over to investigate.

I was greeted with a warning message which I've seen and reported before: ".A drive in a RAID 0 volume is failing. Try to back up data immediately"

I have suspected the NVIDIA driver and/or nTune as the cause of this "false" problem, and I am even more convinced now that one or the other is the culprit.

As before, I started the Intel Matrix Storage Console to mark the drive as normal. However, this time, the console would not start successfully. I tried several more times with the same result.

I decided to shutdown Nighthawk and during the shutdown process, Nighthawk died with a BSOD (Blue Screen of Death).

During the warm restart, BIOS failed to detect the second disk drive and the Intel ICH8R BIOS flagged both RAID volumes as "Failed" and BIOS could not detect any bootable device!

I inserted the Windows Vista x64 DVD and booted it to attempt to repair the Vista installation on the RAID volume. Of course, it failed because it could not find the Vista partition.

Panic started to set in by now, but I was still not overly worried. After all, Nighthawk is a test system and at worse, I would just have to reinstall the operating system(s).

I decided to power off Nighthawk to think about the situation and what I was going to do about it.

I decided to start Nighthawk one more time to see what state it was really in. I was surprised to see BIOS detect both drives and I immediately pressed the delete key to enter BIOS setup. I verified that all BIOS settings were correct and restarted.

Vista detected that it was not shutdown normally previously and presented me with different startup options including safe mode. I elected to start normally and Vista started up with a problem.

I am posting this on Nighthawk.

The lesson learned from this scary episode is not to act hastily when confronted with a problem. I was on the verge of deleting and redefining the RAID volumes on Nighthawk. This would have certainly resulted in destroying all the data on the RAID volumes.

I still believe that this problem is caused by the NVIDIA ForceWare driver and/or nTune since this problem has not surfaced on Nighthawk when I boot Windows XP MCE 2005.

Tuesday, February 13, 2007

Another run at 3.4 GHz

Last month, Nighthawk hit the wall when attempting an overclock to 3.4 GHz with the stock HSF. High temperature was the suspected reason for this failure. I was perfectly content to back Nighthawk down to 3.2 GHz and it has been running at that speed until yesterday.

With its new Zalman HSF and lower operating temperatures, it was inevitable that I would make another attempt at overclocking Nighthawk to 3.4 GHz.

The first step was to go into BIOS and change the DRAM:FSB Ratio back to 1:1 (DRAM:FSB) ratio by setting DRAM Frequency to DDR2-640 before changing the CPU Frequency from 320 MHz to 340 MHz. The DRAM Frequency followed to DDR2-680.

I ran Memtest86 v1.65 for a couple of passes (approximately 45 minutes per pass for 4 GB of RAM) just to confirm memory stability.

I restarted Nighthawk and allowed it to come to an idle state before taking temperature readings.

At 3.4 GHz, the motherboard stayed at the same temperature (28C/82F) and the CPU temperature increased by 1C (39C/102F) compared to the temperature readings at 3.2 GHz with the Zalman HSF.

The next step was to fire up Johnny Lee's SP2004 ORTHOS. I was dismayed to see Nighthawk hit the same wall when it had the stock HSF.

Obviously, high temperature was not the only factor in this failure to reach a 3.4 GHz overclock!

I noticed a disparity between the CPU VCore Voltage setting in BIOS (1.4000V) and the reading in Everest Ultimate which was lower. Furthermore, I noticed that starting Johnny Lee's SP2004 ORTHOS dropped the CPU Core voltage even lower!

I increased the CPU VCore Voltage in BIOS from 1.4000V to 1.4500V, restarted Nighthawk, and started Johnny Lee's SP2004 ORTHOS again.

It has been running without any problem for over 20 hours as I write this post with the CPU temperature not exceeding 51C/124F.

Nighthawk has achieved a stable 3.4 GHz overclock with temperatures I can live with!

Sunday, February 11, 2007

Running cool

It took another 2-3 hours to disassemble, install the Zalman CNPS9700LED HSF, and reassemble Nighthawk after I revived it earlier yesterday morning. After checking all connections, I turned the power on the PSU. The blue ASUS LED light on the P5B Deluxe WiFi-AP motherboard came on.

I pushed the power switch on the case, and the red ASUS LED light on the motherboard came on. All the devices and fans in Nighthawk were running but there was no video signal.

POST failed.

I turned Nighthawk off by keeping the case power switch depressed until all the devices and fans stopped. I then turned off the PSU and waited 5 minutes to trigger the ASUS C.P.R. (CPU Parameter Recall) feature.

I turned the PSU switch on and pressed on the case power switch once more. This time Nighthawk booted successfully to BIOS. I made all the BIOS changes to return it to the overclocked settings for Nighthawk.

One of the things I worried about was Nighthawk's RAID settings for the Intel ICH8R Controller. There was no need to worry. Nighthawk's RAID array and volumes remained intact.

Did the new Zalman HSF make a difference in Nighthawk's processor temperature?

Without a doubt.

Nighthawk's temperature readings at idle without overclocking and with the stock HSF were:

Motherboard: 28C/82F
CPU: 37C/99F

When overclocked to 3.2 GHz, the temperature readings at idle with the stock HSF were:

Motherboard: 30C/86F
CPU: 49C/120F

With the Zalman CNPS9700LED HSF, overclocked idle temperature readings are:

Motherboard: 28C/82F
CPU: 38C/100F

This idle CPU temperature is only 1C higher than the temperature at stock speed of 2.67 GHz and it is 11C cooler at overclocked speed of 3.2 GHz with the stock HSF!

What about temperature performance under load?

I ran 2 instances of SuperPi Mod1.5 XS and the temperature readings at the end of the 20th loop were:

Motherboard: 32C/90F
CPU: 44C/111F

... compared to temperature readings at the same point with the stock HSF:

Motherboard: 33C/91F
CPU: 56C/133F

That's an improvement in the CPU temperature of 12C!

The results from running the System Stability Test in Everest Ultimate were even more dramatic.

The CPU temperature readings with the Zalman HSF were:

CPU (Peak): 53C/127F
CPU (Low): 41C/116F

... compared to temperature readings with the stock HSF:

CPU (Peak): 72C/162F
CPU (Low): 57C/135F

That's an improvement of 19C at peak load and 16C at the lowest point!

Whereas I was unwilling to run the Everest Ultimate System Stability Test longer than 10 minutes with the stock HSF, I would now have no problem running it for an extended period.

The CPU temperature while running Johnny Lee's SP2004 ORTHOS never exceeded 51C/124F.

I am now pleased with the temperature performance of Nighthawk. I believe that my purchase of the Zalman CNPS9700LED HSF has been a good investment.

Blackbird will be getting the same HSF this coming weekend!

Nighthawk is getting a new HSF

Nighthawk has been in a state of complete and partial disassembly since yesterday when I decided to replace the stock Intel HSF (Heatsink & Fan) of the Intel Core 2 Duo E6700 processor with the Zalman CPNS9700LED "Ultra Quiet CPU Cooler" because I was unhappy with its temperature performance. Blackbird will be getting the same HSF.

Installation of the Zalman CPNS9700LED HSF requires removal of the motherboard, so I decided to completely disassemble Nighthawk. I also wanted to take this opportunity to rearrange the peripheral devices.

It took me approximately 2 hours to disassemble, install the new HSF, and reassemble Nighthawk.

I like the way the Zalman CPNS9700LED installs with the backplate. It appears to be a better way to secure the HSF to the motherboard as compared to the Intel HSF which requires a lot of force. I just wished that I had gone ahead and replaced the stock HSF when I initially put the system together.

The blue ASUS LED on the P5B Deluxe WiFi-AP came on when I turned on the Antec NeoHE 550 PSU. It turned to red when I pressed on the Antec Ninehundred case power switch.

POST failed!

There was no video signal. I made sure to check my KVM switch (Keyboard/Video/Mouse) was set to Nighthawk (a mistake I made the very first time Nighthawk was powered on.)

Important observation: This startup was not the now infamous "power on momentarily, power off momentarily, and power on again" sequence of the Intel P965 Chipset.

Panic set in.

My initial thought was that I had destroyed my Intel Core 2 Duo E6700 processor by over tightening the installation of the Zalman CPNS9700LED HSF. I wanted to make sure that the HSF was solidly mated to the processor.

My initial action was to remove/disconnect all unnecessary devices from the motherboard including the Hauppauge PVR-150 TV tuner card, all USB connections, the Firewire connection, the audio connections, the network cable, the wireless antenna, the disk drives, the DVD-RW optical devices, and the diskette drive.

Same problem.

I turned off the PSU and let it sit a couple of minutes before turning it back on to use the ASUS C.P.R. (CPU Parameter Recall) feature of the motherboard.

Same problem.

I installed my StarTech PCI Post Diagnostics Test Card and it displayed the POST code of 43 - for the AMI BIOS, this marks the point where POST is "Ready to start DMA Controller test."

Memory-related issue!

I removed all but one stick of Corsair CM2X1024-8500C5 memory.

Same problem.

I tried all combinations of memory slot placement(s) and number of memory sticks installed.

No luck.

I removed the onboard button cell battery and moved the CLRTC jumper cap to clear the Real Time Clock (RTC) in CMOS RAM. Several times.

Same problem.

I tried a different graphics card, an ATI Radeon X700 Pro which I borrowed from a friend.

Same problem.

I replaced the Zalman HSF with the stock HSF, which meant removing and reinstalling the motherboard. What a pain.

Same problem.

There was one significant change in the way Nighthawk behaved. After approximately one minute, Nighthawk would automatically power off whereas I had to manually power off previously. I checked the mounting of the stock HSF and sure enough, one corner was not securely latched. I had to remove and reinstall the mother board again to note and remedy this problem.

But this was actually good news. It meant my processor was still alive to detect overheating!

I repeated the same series of actions to no avail, giving up a little past midnight. Before going to bed, I decided to turn off the PSU, disconnect the power cable, remove the onboard button cell battery and move the CLRTC jumper to clear RTC RAM. I left Nighthawk in this state overnight.

This morning, I replaced the CLRTC jumper to its normal position, installed the onboard button cell battery, reconnected the power cable and turned on the PSU.

Nighthawk booted into BIOS with 2 sticks of memory. I quickly set the correct date & time, loaded the default BIOS settings, and saved.

Lesson learned: it takes time for the "Clear RTC RAM" to work!

Nighthawk is powered off now while I write this post before tackling the original objective of replacing the stock HSF with the Zalman HSF.

What did I do wrong? In retrospect, I forgot to set BIOS to its default settings before I started this job. I assumed that since I was only replacing the HSF that this would not matter.

I have learned another very important lesson: if one is overclocking (or modified BIOS settings), reset BIOS to its default settings before making any changes to devices connected to the motherboard, no matter how small/minor the change.

Friday, February 9, 2007

Another scary Vista problem

I downloaded the EPSON TWAIN Driver and EPSON Scan utility Version 3.04A for Windows Vista 32-bit and 64-bit Editions again this morning. The new file installed on Vista Ultimate x64 (RTM Build 6000) without any problems this time, and I have been able to successfully use my EPSON Perfection 3170 Photo. EPSON must have fixed the download file overnight. Thanks to EPSON for quickly fixing this problem.
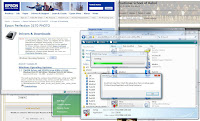
Fix a problem and up pops another problem...

After exiting the Dream Aquarium screen saver, I was alarmed to see this warning message: "A drive in a RAID 0 volume is failing. Try to back up data immediately."

I immediately opened the Intel Matrix Storage Console to get the details of the failure: an error occurred with the physical drive connected to Port 1.

I have a single RAID array using 2 Maxtor 500GB SATA2 disk drives. There are 2 RAID 0 volumes on this RAID array. One volume contains Windows XP MCE 2005 and the second volume contains Vista Ultimate x64 (RTM Build 6000). A failure with either drive means that both operating system installations are at risk.

Since this is my test computer, I don't have anything stored in it which required backup. I used the Intel Matrix Storage Console to mark the drive as normal.

This same problem occurred again later on.

I know that the physical drive is OK because this problem did not occur in Windows XP MCE 2005 which is on a RAID0 volume using the same physical drive.

Here's my hardware configuration:

ASUS P5B Deluxe WiFi-AP motherboard
Intel Core 2 Duo E6700
4 GB Corsair CM2X1024-8500C5
BFG 8800GTS Graphics Card (NVIDIA driver 100.59)
Hauppauge PVR-150 TV Tuner Card
2 500GB Maxtor SATA2 Disk Drives
Antec NeoHE 550 PSU
Vista Ultimate x64 (RTM Build 6000)

Anyone else experience a similar problem?

Thursday, February 8, 2007

Epson Perfection 3170 Photo Vista Driver

I have an EPSON Perfection 3170 Photo scanner which I have been unable to use in Vista Ultimate x64 (RTM Build 6000) for lack of a device driver.

During my daily check of Vista drivers today, I was excited to see that EPSON has released a TWAIN Driver and EPSON Scan utility Version 3.04A for Windows Vista 32-bit and 64-bit Editions.

I quickly downloaded it and attempted to install it.

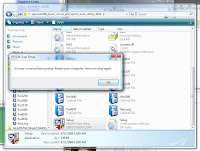
In the middle of the installation, the following error message is displayed in the "EPSON Scan Setup" dialog window: "Could not copy files. Check the setup disc, then run setup again. C:\Users\Gerry\AppData\Local\Temp\\setup.ini"

OK. Maybe I have to run the setup as an administrator, so I tried again. The same error message followed by another error message in the "EPSON Scan Setup" dialog window: "An error occurred during setup. Restart your computer, then run setup again."

OK. Maybe restarting my computer will fix the problem.

Wishful thinking on my part. I encounter the same exact error even after restarting the computer!

What has happened to Quality Control and Quality Assurance?

Are companies like EPSON actually testing their software before they are released to the general public?

The general public has become the guinea pigs for these companies who don't really give a damn about their customers.

Tuesday, February 6, 2007

Realtek RTL8187 Wireless 802.11g

How about the Realtek RTL8187 Wireless 802.11g device on the ASUS P5B Deluxe WiFi-AP motherboard? How well does it work with Vista Ultimate x64 (RTM Build 6000)?

I downloaded the ASUS WiFi-AP Version 6.1262.1212.2006 driver and enabled "USB WIFI/USB 9,10" in the BIOS "USB Configuration" section to find out.

Note: The Realtek RTL8187 wireless device is actually a USB device and some people have physically removed it from the motherboard. Think twice before doing this. I would recommend just disabling the wireless device in BIOS instead unless you really need the additional USB ports.

Vista recognized the Realtek RTL8187 Wireless device and prompted whether I wanted it to install the driver. I declined and installed the driver I downloaded from the ASUS Web site.

Windows Update subsequently downloaded and installed an even newer version: Version 6.1272.106.2007 dated 1/6/2007 without asking me!

I configured the Realtek RTL8187 Wireless device using Vista and it connected to my Wireless Access Point immediately without any problem. The signal quality was excellent, but it had better be because the Wireless Access Point is located just above Nighthawk!

The throughput via the wireless connection was also excellent.

The Realtek RTL8187 Wireless device can also operate as a Wireless Access Point, the reason for "AP" in the ASUS P5B Deluxe WiFi-AP motherboard model name.

Unfortunately for owners of this motherboard who have a need to use the Realtek RTL8187 Wireless device as a Wireless Access Point, there is currently no Vista driver/software for this.

Fortunately for me, I do not require this capability.

Monday, February 5, 2007

APC: Lack of attention to details & the customer

I am a firm believer in the use of UPS (Uninterruptible Power Supply) devices for all of my computers. UPS devices provide clean, stable power to the computer and provides a normal, orderly shutdown of the computer in case of power failures.

The only UPS devices I use for my computers are APC (American Power Conversion Corporation) Back-UPS devices. Blackbird uses the Back-UPS XS 1500 with the extra battery pack and Nighthawk uses just the Back-UPS XS 1500.

Since installing Vista Ultimate x64 (RTM Build 6000), I have been patiently waiting for APC to release their PowerChute Personal Edition for Vista.

Yesterday, I noticed an announcement in APC's Support page (Knowledge Base) about the availability of PowerChute Personal Edition Version 2.1 for Windows Vista.

On the page is a URL for the page with the "latest versions of PowerChute Personal Edition." However, the published URL is not a link. If you want to go to the page, you'll have to copy and paste it into the browser address field.

How difficult would it had been for someone at APC to create the URL as an active link?

I copied and pasted the URL into the browser address line while muttering under my breath.

I guess my eyesight is starting to fail me because I did not see any sign of PowerChute Personal Edition Version 2.1 on the page. I put my reading glasses on just to make sure.

Yep. No sign of the mentioned Vista version.

Maybe it's on the "Free Download" page for Version 2.0, so I clicked on the button.

No sign of PowerChute Personal Edition Version 2.1 for Windows Vista on this page either. There's the version for Solaris, a couple of versions for the Mac OS X, and a couple more versions for Windows 2000 and Windows XP, one of which also works for Windows 98 or Windows ME.

I'm still hopeful of finding Version 2.1 and I click on the "Continue" button for Version 2.0 thinking that maybe Version 2.1 is not a major release, just a "dot" release not meriting its own page.

It brings me back full circle to the page which I have been checking almost daily for signs of a Vista version of the APC PowerChute Personal Edition software.

It makes one wonder is Version 2.1 actually even exists.

Did APC jump the gun in announcing its availability? Did APC provide the wrong URL? Did APC forget to post the new version?

It doesn't matter what the reason is. It demonstrates incompetence, at best. Hopefully, it doesn't demonstrate lack of customer focus and attention by APC.

I am appalled at the lack of customer service shown by the majority of companies today.