Monday, March 26, 2007

My iaStor Problem Solved!

Disabling the on board Realtek RTL8187 Wireless device and uninstalling its Vista x64 device driver has resolved the iaStor timeout problems on Nighthawk.

After 14 hours without a single iaStor timeout problem, Nighthawk was shutdown, all USB ports (except for the Realtek RTL8187 Wireless device) enabled in BIOS, and Vista Ultimate x64 restarted. Nighthawk has now been running in this configuration for over 36 hours without a single iaStor timeout problem.

Why did I disable the USB ports to begin with?

The on board Realtek RTL8187 Wireless device is actually a USB device!

The USB Universal Host Controller 2831 uses the same IRQ as the Intel(R) 82801HR/HH/HO SATA RAID Controller - 13 (19). The USB and USB2 Universal Host Controllers also utilize memory resources right next to the memory resources allocated to the Intel(R) 82801HR/HH/HO SATA RAID Controller (more commonly known as the Intel ICH8R Controller.)

In fact, the memory resources allocated to the Intel(R) 82801HR/HH/HO SATA RAID Controller start at address FEBFF800, which immediately follows where the memory resources allocated to the USB2 Universal Host Controller 2836 ends at address FEBFF7FF.

A poorly written driver for a USB2 devices, e.g., the Realtek RTL8187 Wireless device, can easily cause a problem for the Intel ICH8R Controller if it writes outside its allocated address space, even by just one address location!

ASUS has just released ASUS WiFi-AP Solo driver V1285-7.3.13.0 for VISTA 32bit/64bit, a beta driver. I am not going to touch it. Fortunately for me, I have no need for the on board Realtek RTL8187 Wireless device.

Sunday, March 25, 2007

iaStor Timeout Errors

Running Vista Ultimate x64 on Nighthawk without any USB ports is not an option for me.

Yet, Nighthawk has been running without any more iaStor timeout problems for over 20 hours since I disabled all of its USB ports.

I had to figure out a way to get my USB ports back on Nighthawk without suffering iaStor timeout problems.

I noticed that the Realtek RTL8187 Wireless 802.11g device driver Version 6.1272.106.2007 was still installed. I decided to uninstall this device driver using the Vista Control Panel Programs & Features, shutdown, enable the USB ports, and restart.

The Vista Control Panel Programs & Features invoked the Realtek RTL8187 Wireless 802.11g device driver to uninstall itself. This is evident from the messages displayed during the uninstall process.

Almost immediately, Vista informs me that "A drive in a RAID 0 volume is failing. Try to back up data immediately." I immediately checked the Event Log, and sure enough, there were 45 iaStor timeout errors!

Very interesting!

I started the Intel Matrix Storage Console and marked the "failing" drive as "normal," and restarted Nighthawk with the USB ports still disabled.

Nighthawk has been running stable in this state for over 14 hours now.

My next step is to shutdown, enable the USB ports and restart Nighthawk. I'm going to do this immediately after publishing this post.

Saturday, March 24, 2007

Vista Reliability Monitor

One of the best features of Vista is its "Reliability Monitor."

Vista's Reliability Monitor assigns a "Reliability Index" from 0 to 10 to your system daily, based on the number and frequency of the following types of failures:
  • Application Failures
  • Hardware Failures
  • Windows Failures
  • Miscellaneous Failures
Vista's Reliability Monitor also tracks all software installations and uninstalls, which is very useful for correlating failures to software changes in your system.

Vista Ultimate x64 (RTM Build 6000) was installed on Nighthawk on January 20, 2007. As one can see from the System Stability Chart, it was very stable with a Reliability Index of 10 from its Vista installation until February 1, 2007.

What happened with Nighthawk on February 1, 2007?

On February 1, I installed a new driver (and software) for my Hauppauge PVR150 TV Tuner card in an attempt to make it work with Vista's Windows Media Center.

The Hauppauge PVR150 does not work with Vista x64 on a computer with the ASUS P5B Deluxe WiFi-AP motherboard, 4GB of memory, and "Memory Remap" enabled in BIOS.

I installed the Hauppauge WinTV2000 application to see if it would work with the PVR150. The WinTV2000 application failed in each of 3 attempts with a "Stopped responding" condition as noted by Vista's Reliability Monitor.

Nighthawk's Reliability Index fell to 8.3 because of these failures.

Nighthawk's Reliability Index continued to fall in the following days as I grappled with troublesome drivers for my NVIDIA 8800GTS video card and my onboard SoundMAX audio device.

Although these problems were very annoying, the next problem confronting me starting on February 8, 2007 was more serious: my RAID0 array consisting of 2 Maxtor SATA II 500GB drives connected to the onboard Intel ICH8R Controller started failing with an iaStor error ("The device, \Device\Ide\iaStor0, did not respond within the timeout period.")

What changes did I make to Nighthawk just before this serious iaStor timeout problem started happening?

Well, I enabled the onboard Realtek RTL8187 Wireless 802.11g device and installed the ASUS WiFi-AP Version 6.1262.1212.2006 driver on February 6, 2007 as previously noted in this Blog.

Windows Update subsequently downloaded and installed an even newer version: Version 6.1272.106.2007 dated 1/6/2007 without asking me!

Vista's Reliability Monitor showed even more interesting (incriminating?) information.

On that same date, the driver for the Intel ICH8 Family USB and USB2 Universal Host Controllers 2834, 2835 and 283A were updated to Version 8.0.0.1008. Note that I had installed Intel's Chipset Driver Version 8.1.1.1010 on Nighthawk immediately after installing Vista Ultimate x64.

Yesterday, I started suspecting that the onboard Realtek RTL8187 Wireless device and its driver was the cause of the iaStor timeout problem. I disabled it in BIOS and started Nighthawk. However, Vista Ultimate x64 started experiencing iaStor timeout errors (26 errors) approximately 3 hours later.

I shutdown Nighthawk, disabled all USB devices, and restarted Nighthawk. Approximately 20 hours later, Vista Ultimate x64 was running stable without any iaStor timeout problems.

Coincidence?

Sunday, March 18, 2007

No Vista x64 support for APC PowerChute Personal Edition 2.1

I use APC (American Power Conversion Corporation) UPS (Uninterruptible Power Supply) products for all of my home computers. I consider a UPS device an essential component for a home computer. So I was happy to note that APC finally released PowerChute Personal Edition Version 2.1 for "Windows Vista."

I quickly downloaded it (23.6 MB) and immediately attempted to install it on my Vista Ultimate x64 (RTM Build 6000) system (Blackbird).

The installation went through the normal process of the "InstallShield Wizard (R) extracting the files needed to install APC PowerChute Personal Edition on my computer."

The installation then went through the normal process of "preparing the InstallShield (R) Wizard to guide me through the rest of the setup process."

I was feeling good at this point. I was looking forward to finally having my Vista Ultimate x64 computer fully protected by my APC Back-UPS XS 1500 in case of power failure and/or brown-outs.

My optimism was premature.

I was greeted with the following message: "You are attempting to install software that is intended for Microsoft (R) Windows (R) Vista."

I immediately fired off an email to ACP Support to report the problem. I was actually surprised to receive a response during the weekend. I wasn't expecting one until the middle of the work week at best. Kudos to APC for good customer service.

However, I was not entirely surprised by their response: "Please note the version PowerChute Personal Edition version 2.1 can be used only with Windows Vista operating system. It cannot be used with Windows Vista Ultimate x64. As of now we do not have a software for Vista Ultimate x64. We are working on a solution, but do not have an expected release date at this time. I am sorry for any inconvenience."

I guess that's that.

Wednesday, March 14, 2007

Restore using Windows Home Server

How many of you have a backup & recovery plan for your home computer?

And how many of you that do have tested your backup & recovery plan before you actually have to use it for real?

Backup and restore with Windows Home Server is very easy. In previous posts, I have shared how easy it is to backup your home computer(s) using Windows Home Server.

In this post, I will actually attempt to perform a partial and full restore.

To perform a partial restore (e.g., to restore files and/or folders), login to your server using the Windows Home Server Console. In the "Computers & Backup" page, select the home computer and click on the "View Backups" button.

A list of backups for the selected computer will be displayed. Select the backup from which you wish to restore and click the "Open..." button.

Depending on how many folders and files are included in your backup, it might take awhile for the Windows Home Server to create a list of the folders and files in your selected backup.

It took a long time for me, and the "Opening Backup" dialog box stayed at 95% complete for over 30 minutes.

Eventually, an Explorer window with my drives, folders and files in the selected backup was be displayed. When it did, I noticed that Windows XP detected a new device and installed a driver for the new device. I was not quick enough to get a screen capture of this. I was also informed that the driver was successfully installed and prompted to restart which I declined.

The next and final step was to select the file(s) and/or folder(s) to restore and drag to a specified location in my home computer.

That's how easy it was to restore files and folders from the Windows Home Server!

To test a full restore, I removed a 15GB hard drive from my old laptop and installed a spare 12GB hard drive. I powered up the laptop, inserted, and booted off the "Windows Home Server Restore" CD.

The boot process was very similar to the Vista installation and it successfully loaded the drivers for all the devices including the Netgear Gigabit PC Card (GA511), unarguably the most important device at this point since it is required to connect to the Windows Home Server.

Eventually, the "Restore Computer Wizard" started and I was prompted to "Log On to your Windows Home Server."

I logged on and I was prompted to "Choose a Computer to Restore." I was pleasantly surprised that my "Bluebird" computer was automatically selected! I suspect that Windows Home Server correctly identified which home computer to restore based on the MAC address of its network device.

I was then prompted to "Choose a Backup to Restore."

Unfortunately, I was unable to proceed beyond this stage because the size of the backup was 14.06GB and the available space on my blank hard drive was only 11.24GB.

However, I believe that I would have been able to successfully restore my computer if I had a hard drive with the same or greater capacity as the original drive.

I'll try again in the near future since this will be an easy way to upgrade the hard drive in a laptop to one of greater capacity!

Monday, March 12, 2007

Remote access using Windows Home Server

Windows Home Server provides secure remote access to your server and home computers (with remote access enabled).

It provides this service using Remote Desktop Protocol (RDP) combined with Remote Web Workplace (RWW), a popular feature of Windows Small Business Server.

According to most accounts I have read, this combination is more secure than using Remote Desktop Protocol (RDP) on its own. I am still investigating the security implications of RDP over RWW, so all my testing have been performed inside my own network behind my firewall.

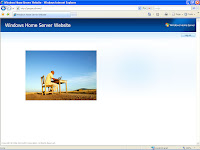
Access your Windows Home Server by entering its address in your Web browser and click on the "Log on" button in the Windows Home Server Website page to begin.

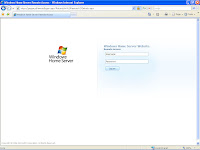
Enter your Windows Home Server username and password and click on the "Log on" button to continue.

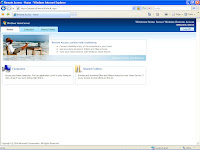
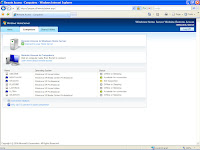
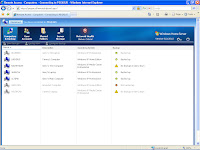
Upon a successful log on, you will be presented with the Windows Home Server Website Remote Access page.

Note that you now have access to your home computers which have remote access enabled, and to the Shared Folders on your Windows Home Server.

Click on the tab labeled "Computers" to access your home computers.

The first time you attempt to remotely access one of your home computers, you will be prompted to install an ActiveX control for Windows Home Server remote access. You must install this ActiveX control.

You will then be presented with the options to connect to your Home Server or to remotely access any of your home computers which have remote access enabled.

Select the home computer you wish to remotely access using Remote Desktop Protocol (RDP) over Remote Web Workplace (RWW).

This will initiate a Remote Desktop Connection to the selected home computer assuming that it is available for remote connection, i.e., it has remote access enabled.

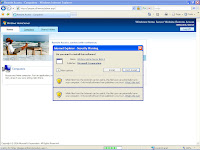
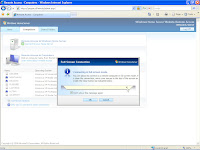
A message reminding you that you are about to connect to your home computer in full screen connection with instructions on how to close the connection just in case you have never used Remote Desktop Connection before. Clicking on the OK button connects you to your selected home computer in full screen mode.

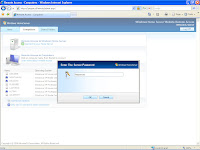
If you had selected the option to connect to your Home Server instead, you will be prompted for the Windows Home Server administrator password.

Note that this is not a Remote Desktop Connection to your Home Server. It simply provides you access to your Windows Home Server Console.

Regardless, it is important you have a "strong" password for your Windows Home Server administrator username, specially if you enable remote access from the Internet.

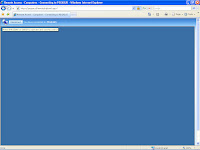
Upon successful log on to your Windows Home Server, you will then be prompted to "Press SPACEBAR or ENTER to activate and use this control" (the ActiveX control you installed at the beginning of the remote access session.)

The Windows Home Server Console is then displayed.

You can now remotely administer your Windows Home Server.

This is the reason why you must have a "strong" password for your Windows Home Server administrator username.

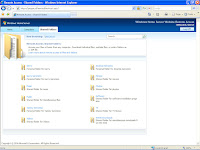
If you wish to access your Shared Folders instead of remotely accessing your Windows Home Server or one of your home computers, select the "Folders" tab from the Windows Home Server Website Remote Access page.

As previously stated, I am still undecided on whether to enable remote access from the Internet until I have fully assessed its security implications. These features of Windows Home Server remote access sure make it very tempting to use!

Sunday, March 11, 2007

A week with Windows Home Server

It has been just over a week since I moved my Windows Home Server into a closet. My server has been running non-stop since then, and I have not had any reason to physically access it.

I have noticed that disk activity on the server has also been non-stop since then. Windows Home Server definitely keeps itself busy.

A lot of files have been copied to the server in the past week.

The 1.11 terabyte of disk space in my Windows Home Server have almost been used up. There are only 135.8 GB of storage space left on the server and I have not moved everything I want to store on the server!

Just recently in the past couple of days, I have noticed that the "Shared Folders" view in the Windows Home Server Console now sports a graphical "Used Space History." The chart has a slider control to select the history period: 1 week, 1 month, 1 year and "max."

I don't know whether this is a recent update to Windows Home Server Console or not, but I had not seen it previously.

Another feature of Windows Home Server is "Media Library Sharing" which is used "to stream music, photos, and videos from shared folders on your Windows Home Server to other devices in your home."

My music on the Windows Home Server appear and play in my Windows Media Player under Vista Ultimate x64. However, I don't see my entire music collection. I wonder if Windows Home Server has not completed cataloging my extensive music collection yet.

My evaluation copy of Windows Home Server Beta 2 expires on March 2, 2008. I already know that I can't live without it.

The "Version Information" under "Resources" in the Windows Home Server Console provides an insight into what comprises Windows Home Server: Admin Console, Backup & Restore, Drive Extender, Remote Access, and Storage Manager.

I will be experimenting with remote access next.

Saturday, March 10, 2007

Monitoring backups

Windows Home Server actively monitors the status of backups for all connected home computers. It rates your "Network Health" based on the backup status of your connected home computers.

Windows Home Server informs all connected home computers of any and all backup status that requires the administrator's attention in a manner that is difficult to ignore. The Windows Home Server Console quick launch icon turns bright red and a pop-up message is displayed above it for every backup status that requires attention.

The administrator can also use the Windows Home Server Console to view and manage the backup details of each connected home computer.

The initial backup of each connected home computer is locked and kept by default and all subsequent backups are managed automatically. The reason why the initial backup is locked and kept by default is because each subsequent backup is incremental, i.e., only files that have changed since the last backup are included.

Click on the "Network Health" icon in the Windows Home Server Console to view all backup warning and error messages.

Windows Home Server issues a warning message if connected home computers have not backed up for 2 days or more. It issues an error message if a backup error has occurred.

There is a known problem backing up a home computer to the Windows Home Server over a wireless network connection. This is the reason for the Unicorn backup error in my network.

There are some other minor bugs with regards to the update of the backup status in the Windows Home Server Console. Other than these minor problems, backup appears to be working. However, the proof will be if I am able to restore (full and partial) from a backup.

Thursday, March 8, 2007

Backup using Windows Home Server

Your home computers on which you have installed the Windows Home Server Connector are automatically backed up between midnight and 6:00 AM by default.

Backup Management is also automatic. By default, the first backup of the month is kept for the last 3 months, the first backup of the week is kept for the last 3 weeks, and the first backup of the day is kept for the last 3 days.

You can change these backup parameters in Windows Home Server, and you can also manually initiate backup via the Windows Home Server Console or the quick launch icon in the Start bar.

Enter a backup description and click on "Backup Now" to manually start the backup of your home computer.

If you wish, you can monitor the progress of the backup by selecting the appropriate option from the Windows Home Server quick launch icon in the Start bar.

The backup process is unobtrusive. You can continue working without noticing that the backup is in progress.

The backup of your home computer to your home server is also relatively quick.

Network utilization by the backup also appears to be minimal.

I did not observe any slowdown in my network while backup to the Windows Home Server was in progress.

I really like how easy and painless backup is with Windows Home Server.

Wednesday, March 7, 2007

Configuring automatic backup

A very important feature of Windows Home Server is that it will automatically backup your home computers to the server. Of course, it will also allow you to restore from the backup selective files, folders or the entire computer to a previous point in time.

By default, backup is configured to back up all files in your home computer except for temporary files, etc. You can change the backup configuration by selecting "Configure Backup" in the Windows Home Server Console.

A Backup Configuration Wizard starts which allows you to select the disk volumes to backup and folders to exclude from backup.

Note that when backing up multiple home computers, the Windows Home Server is "smart" enough to identify common files, e.g., operating system files, and it only stores these files once on the home server to conserve space.

As previously noted, user temporary files, the system page file, the recycle bin folder and the shadow volume implementation folder are automatically excluded from the backup.

You can add additional folders to be excluded from backup. These may be folders with files that are already in the Shared Folder, e.g., music, photos and videos.

The initial time I attempted to exclude folders, I was presented with a message indicating "Home PC is unresponsive" but it worked after the first time.

It is helpful that the list of folders show the size of each folder to assist one in determining which folders to exclude.

After you have completed selecting volumes to backup and folders to exclude, the Backup Configuration Wizard displays a summary of your backup configuration: the number of volumes to backup, the number of excluded folders, and the estimated backup size.

And you're done configuring automatic backup of your home computer to your Windows Home Server!

Tuesday, March 6, 2007

Personal Folders

When a user is added to Windows Home Server, a Personal Folder on the home server is automatically created for the user.

This Personal Folder may be used by the user to store his/her files on the home server. The user is responsible for manually maintaining and keeping the files current in the Personal Folder.

The Windows Home Server Backup, to be covered in my next posting, should be used instead for automatic backup of files.

By default, "Folder Duplication" is enabled for the user's Personal Folder on the home server. As noted in a previous posting, enabling Folder Duplication means that Windows Home Server will automatically place a copy of the folder and its contents on a separate physical drive for redundancy to protect against a disk drive failure.

This option may be disabled in the "Properties" for the Personal Folder.

Also by default, only the owner of the Personal Folder has Read/Write access to his/her Personal Folder. Everyone else has "No Access" to Personal Folders other than the one belonging to them.

User access to Personal Folders can only be changed by the Windows Home Server administrator in the "User Access" tab of the Personal Folder properties. The owner of the folder cannot change user access for his/her own Personal Folder.

The Personal Folder is an easy way to provide file storage space on the home server for users. It is easily accessible via the "Shared Folders on Server" shortcut on the desktop or the "Network" link in the Start menu.

Sunday, March 4, 2007

Windows Home Server Connector

Windows Home Server comes with a "Connector" which is intended to be installed on the other computers in your home network.

Windows Home Server Connector "backs up your home computer daily" to the Windows Home Server. In addition, it allows the Windows Home Server to "monitor the health of your home computer."

I was a little dismayed to find out that Windows Home Server does not support 64-bit operating systems such as Vista Ultimate x64 on Nighthawk. I was not aware of this limitation and after I attempted the installation, Nighthawk locked up hard, ignoring any keyboard or mouse input. Nighthawk had to be reset to recover.

Microsoft has not announced any plans on supporting 64-bit systems with Windows Home Server which is a shame.

I restarted Nighthawk with Windows XP MCE 2005 and installed the Windows Home Server. It can be installed from a CD or from the "Shared folder for software installation programs" on the Windows Home Server. I chose the latter.

It is clear that the Windows Home Server connector is meant to be installed by the Windows Home Server "administrator" because the first thing it prompts you for is the password for the administrator.

After the administrator's password is correctly entered, Windows Home Server Connector links your home computer to the server and configures your computer backup.

A shortcut to the "Shared Folders on Server" is added to your desktop and a "Quick Launch" icon is added to your computer's Start bar. This icon allows you to:
  • Start the Windows Home Server Console"
  • Backup Now...
  • View Backup Status
  • Update Password...
  • Access the Shared Folders, and
  • Display Help information
The first thing you will need to do is add a "User Account" for the computer's user, if you haven't already done so. Windows Home Server allows you to define a maximum of 10 user accounts that can access your home server.

Start the Windows Home Server Console and upon entering the administrator's password, the console will connect to your home server.

Select the "User Accounts" page and click on "+ Add" to add a new user to your home server.

You will be prompted to enter the user's "First Name," "Last Name" (optional) and "Logon name."

Hint: Enter a "logon name" which matches the user's account on their computer.

You may also enable "Remote Access" for this user. (More on this subject later.)

Press the "Next" button and you will be prompted to enter the user's password twice (the second time for confirmation).

"If you create a user account and password on the server that matches a user account and password on your home computer then you will not be prompted for authentication each time you access a shared folder on the server."

The Windows Home Server Console will then add the user account, set access to shared folders, create a shared folder for the user on the server, and enable remote access (if you enabled this option for the user.)

That's it! That's how easy it is to define a user to your Windows Home Server.

The Windows Home Server Console is only intended to be used by the home server administrator. In fact, other users defined to your home server have no access to the home server console.

Next up: Personal folders and controlling access to Shared Folders.